1. Introduction to Reinhardt
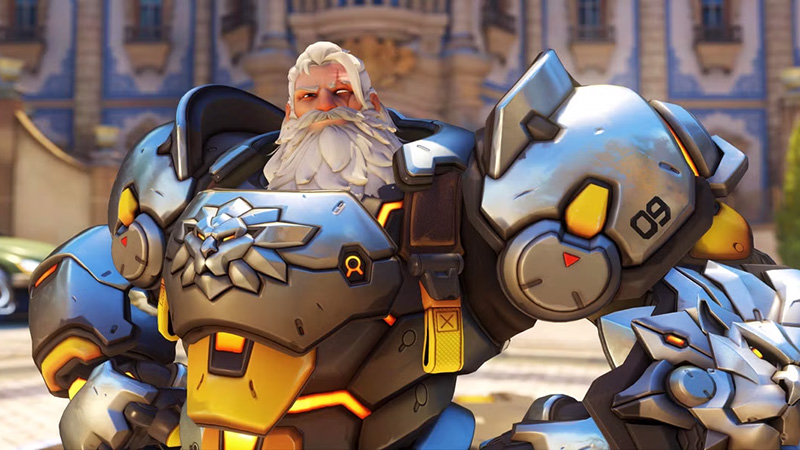
Reinhardt Wilhelm is a stalwart crusader from Germany, a former member of Overwatch and one of the game's original main-tanks. Clad in powered armor and wielding a massive Rocket Hammer, Reinhardt epitomizes the chivalrous knight archetype. In Overwatch 1, he was a pillar of front-line defense; in Overwatch, he has retained his role as a heavy barrier main tank, leading pushes and protecting teammates with his enormous shield.
His meta position in Season 16 (April 2025) is situational: he excels in coordinated, slow-frontline or double-shield compositions (e.g. with Orisa or Sigma), but is less dominant in high-mobility "double DPS" metas. Analyst tier lists rank Reinhardt around B-tier—effective with team support but easily overwhelmed by dive or long-range flanks.
Nevertheless, across skill levels Reinhardt remains viable: in lower ranks his shield provides invaluable protection and his simple kit is forgiving, while at higher ranks he demands precise positioning and game knowledge to succeed. Recent balance changes (Dec 2024) shifted his health from armor into base HP and gave back 30% knockback reduction, buffing his durability. Overall Reinhardt is a high-health, barrier-centric tank ideal for creating space and enabling his team's advance.
2. Ability Breakdown
Health & Passive (Steadfast)
Reinhardt's total health is 550 (325 base + 225 armor). His passive "Steadfast" reduces incoming knockback by 30% and reduces damage from critical hits (headshots) by 25%. He also generates ultimate charge 40% slower from damage received (typical of all tanks). In addition, like all heroes he regenerates 20 HP/sec after 5 seconds out of combat.
Rocket Hammer (Primary)
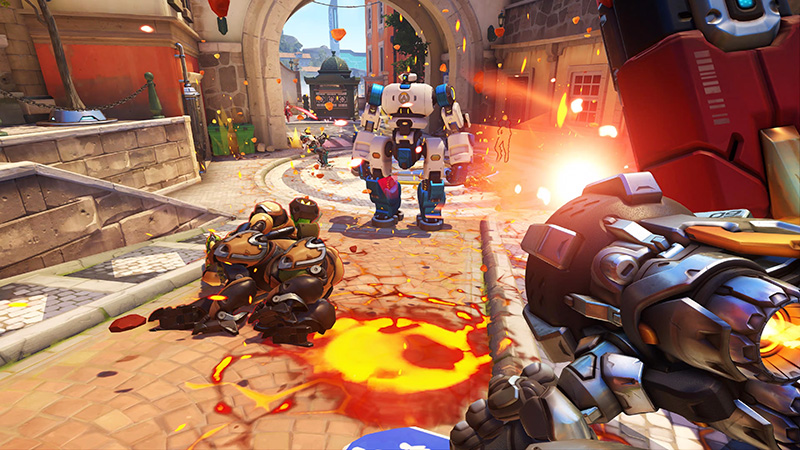
Reinhardt's melee weapon swings a 5-meter-wide 180° arc (approx. 10m diameter cleave if turning). It deals 85 damage per swing (1.15 swings/sec). The hammer swing knocks enemies back slightly and can bounce them if they hit a wall. The lingering hitbox and ability to pivot allows one to damage multiple foes by rotating mid-swing. There is no cooldown on swings, but Reinhardt cannot attack while his Barrier is up.
Barrier Field
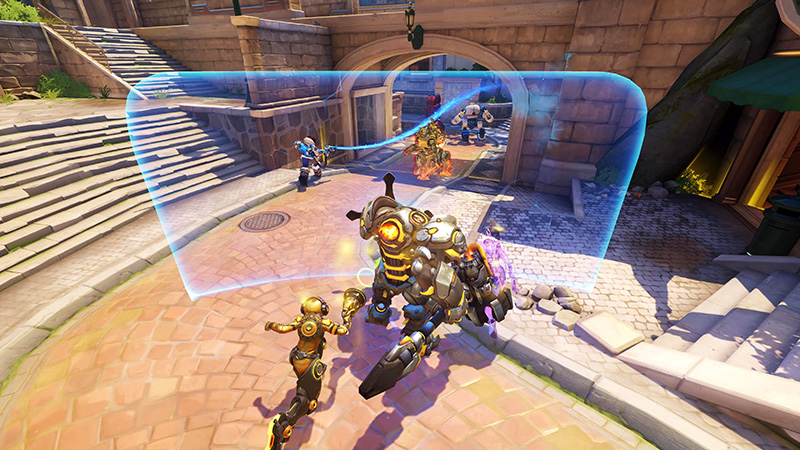
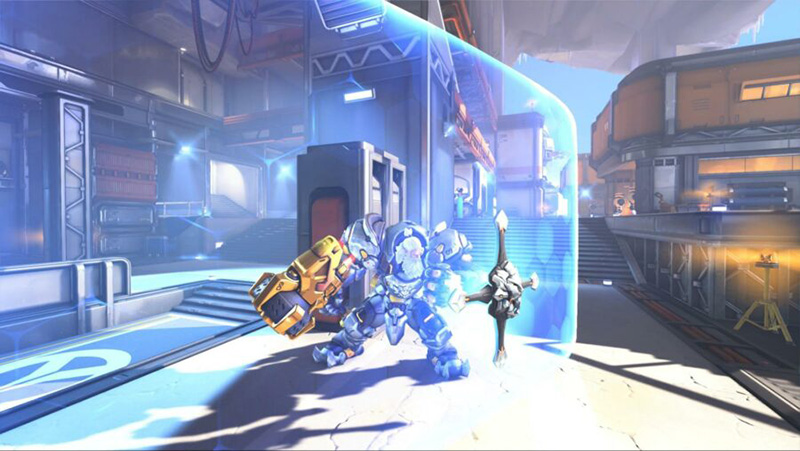
Reinhardt projects a large rectangular shield in front of him. As of the current patch, the barrier has 2000 HP (up from 1500), moves at 3.85 m/s (30% slow), and blocks all enemy damage and projectiles (except certain "barrier-piercing" attacks). If broken, the barrier is dropped and begins regenerating 160 HP/sec after 2 seconds of downtime. If the shield is destroyed ("shattered"), it cannot be raised for 5 seconds. Reinhardt can hold or toggle the shield; he can also "peeks" by moving and free-looking while shielding. Managing Barrier HP is crucial – it has effectively infinite duration but can break if overextended.
Charge
On activation Reinhardt lunges forward at high speed. If the charge collides with an enemy and pushes them into a wall, that enemy is stunned (pin) and takes 300 damage. If the charge merely bumps a target (or a target is already pinned), they take 50 damage and are knocked aside. Reinhardt can cancel Charge early by pressing the ability key again. Charge has a 10-second cooldown (up from 7s) and can travel until hitting a wall or obstacle. Charge is Reinhardt's gap-closer and heavy burst option – a wall-pin combo can one-shot many non-tanks.
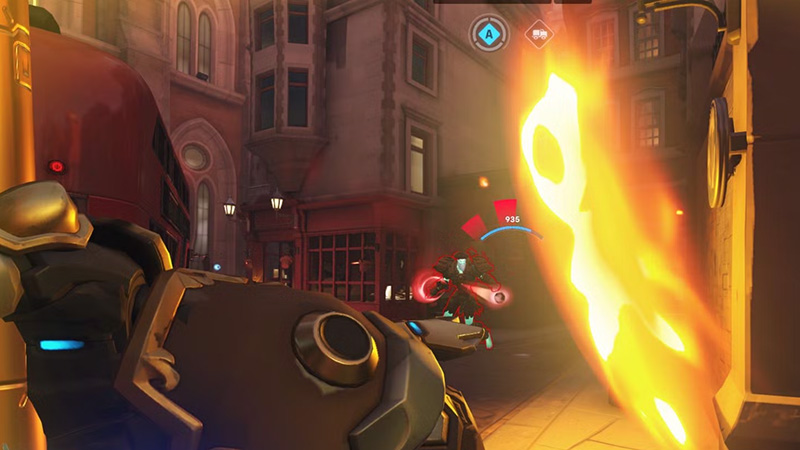
Fire Strike
Reinhardt hurls a flaming projectile that pierces enemies and barriers. Fire Strike deals 100 damage to each target hit, regenerates 25 Ultimate charge per hit, and has a 6-second cooldown. The projectile travels at ~26.7 m/s and stops on solid terrain. It cannot be headshot. Fire Strike is his only consistent ranged attack; it's excellent for zoning, chipping enemy barriers or building ult charge. It can hit multiple foes lined up.
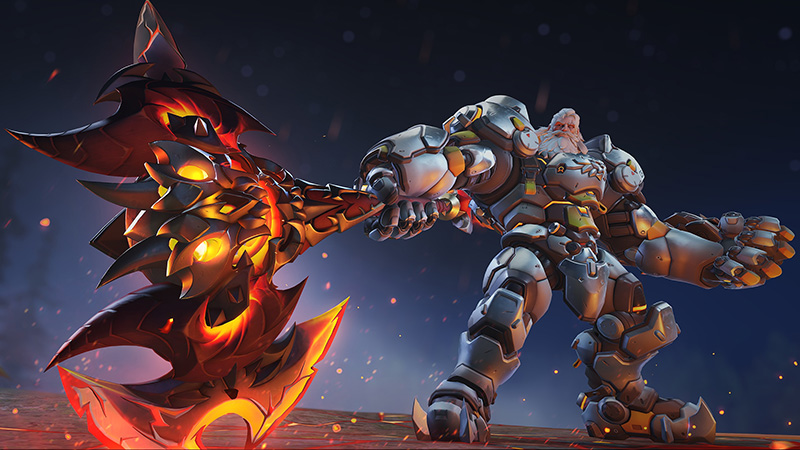
Earthshatter (Ultimate)
Reinhardt slams the ground, sending out a horizontal shockwave in a 20-meter cone (reduced from 25m in 2024). Enemies hit are knocked down and stunned for ~3 seconds and take 50 damage (plus an extra 150 damage if within 1.75m). Earthshatter will break barriers but cannot pass through an enemy or obstacle. It's an area-of-effect crowd-control ult that requires line-of-sight. The animation is 0.9s total, and Reinhardt must be grounded to complete it.
| Ability | Damage | Cooldown | Notes |
|---|---|---|---|
| Rocket Hammer | 85 per swing | None | 1.15 swings/sec, 5m wide arc |
| Barrier Field | N/A | 5s if broken | 2000 HP, regens 160 HP/sec after 2s |
| Charge | 300 (pin), 50 (bump) | 10s | Can be canceled early |
| Fire Strike | 100 per target | 6s | Pierces enemies and barriers |
| Earthshatter | 50 (200 if close) | Ultimate | 20m cone, 3s stun |
3. Shield Management Mastery
Shield management is fundamental: Reinhardt's Barrier has no built-in cooldown but acts as an "HP pool" that, when broken, penalizes him. Key principles are barrier economy and mind games. You should only absorb meaningful damage – for example, block high-damage ultimates or heavy DPS output, but allow small poke (like enemy Tracer dashes) or environmental damage through.
Constantly monitor the barrier's HP: at ~800/2000 it starts cracking, and at ~320 it issues a warning. Rotate the barrier down before its health falls too low, letting it regenerate (160 HP/sec after 2s) rather than shattering. When your shield does break, back off for a moment – you have a 5-second penalty before it can come back up.
Techniques include "shield peeking" (flicking the barrier in and out of view to bait enemy fire and reveals), angling the barrier to cover maximal area, and staggering its usage so the enemy cannot predict exactly when it'll break. For example, briefly drop and re-raise the shield to "reset" enemy aim or to feign weakness. You can also toggle off the shield to dash or animate, then quickly re-activate.
In 1v1 mind games, you might let a portion of damage slip through to force your opponent to overextend into your hammer. Effective barrier use means blocking big threats and bidding time for your team, while concealing your true condition to outplay opponents.
4. Charge Techniques and Mechanics
Charge is Reinhardt's signature high-risk play. Its two collision modes (direct pin vs grazing bump) mean you should aim carefully. When pinning, ensure a clear line to a wall – knocking an enemy into any solid surface triggers the 300-damage stun. Plan charge paths in your map knowledge: for example, use side corridors or high-ground drop-offs to pin in a safe direction.
Learn each map's terrain: some walls (like payload ramps or cliffs) are perfect pin targets. You can cancel Charge mid-lunge by pressing the button again, which is useful if you see it won't hit a target or if interrupted (e.g. by Briétte bash or Doomfist punch). Cancelling also allows quicker recovery.
Against specific heroes, adapt: avoid charging Pharah (high in sky), as they can escape or counter you. Conversely, charging a lone sniper or squishy DPS can quickly end fights. After Charge, you get a small speed boost; use this to reposition or back away if you miss.
Another mechanic: if you collide with a non-wall while already pinning one target, the second target takes only 50 damage (no stun), so try to plan single pins. Good players "bait" abilities (hovering charge to draw Genji deflects or Winston bubbles) before committing. In tight corridors, be wary of ricochets – you can unintentionally pin yourself.
Always have a fallback plan: if Charge fails, immediately raise your shield and re-engage with Hammer or Fire Strike. Mastery here is about knowing when Charge will net a kill vs when it's suicidal, and cancelling it if danger looms.
5. Fire Strike Optimization
Fire Strike is Reinhardt's lone long-range weapon. Use it to farm Ultimate charge, poke at distance, or finish off fleeing targets. It pierces both heroes and barriers, so line it up to hit multiple enemies or even hit Reinhardt's own barrier and bounce back for extra utility.
Aim for slow or grouped targets (e.g. Bastion, enemies behind cover, or those already stunned). In ult combos, Fire Strike is often the follow-up after Earthshatter: the stunned victims present a perfect shot (and you might hit several for 25% ult per hit). Its 100 damage means it can one-shot 150-HP targets.
Be mindful of its 6-second cooldown—don't waste it on low-priority shots. Against barriers, a Fire Strike will chew barrier HP and partially recharge your ult. Also, if an enemy is behind a breakable barrier (Symmetra turrets or builds), Fire Strike helps clear them.
In close quarters, consider "animation canceling" a hammer swing into a Fire Strike to burst a fast enemy (see next section). In short, Fire Strike should be used in rhythm with your swings: after hammer engagements, or to snipe key targets from cover; it's your tool for ultimate charge and ranged pressure.
6. Hammer Swing Techniques
Swinging Reinhardt's Rocket Hammer effectively is an art. Each swing covers about a 5-meter cone; two swings can heavily damage a 250-HP hero or kill any 200-HP hero without healing. Cleave optimization: turn mid-swing to hit enemies behind or beside you – the hammer actually sweeps a 10m-diameter disc. For example, if an enemy tries to flank on your side, time a swing and pivot. Avoid single-hit swings when multiple enemies are clustered: hit as many as possible by timing swings or charging into the cluster.
Animation Cancels
Right after your hammer connects, you can immediately use Fire Strike to "cancel" the lingering swing animation, dealing a fast follow-up shot at the struck target. This combo is crucial on evasive heroes (Tracer, Genji); you can swing for 85 damage, then quickly Fire Strike for 100, often before they react. After landing a charged pin, similarly, Fire Strike can quickly finish the pinned target.
// Animation Cancel Combo
Hammer Swing (85 damage) → Fire Strike (100 damage) = 185 damage total
// This nearly eliminates 200 HP heroes if you connect with both hits
Timing and Weaving
Between swings, you can move or even briefly drop the shield to quickly re-raise and continue attacking. There is no quick melee, but if an enemy is very close after your swing, you can cancel the return swing by moving forward and swinging again immediately. Essentially, treat each swing as an area-denial tool: swing, reposition, swing again.
When pushing with barrier, occasionally drop shield to widen your attack cone or to side-step an incoming crowd-control. Always be ready to switch from offense to defense by flipping up the barrier immediately after a swing if enemies counterattack. Mastery is feeling the melee rhythm: don't remain idle with your hammer out, keep enemies in threat of a multi-hit combo.
7. Earthshatter Mastery
Earthshatter is Reinhardt's ultimate crowd-control. An optimal Shatter requires setup and follow-up. Good setups include combinations like Zarya's Graviton Surge (grouping enemies in the cone) or Mei's freeze walls (blocking escape routes). Dive with your team: a Lucio speedboost into a line of enemies can let you close distance and slam. Timing is key—if you or a teammate draws enemy shields (e.g. Orisa's halt or Bastion cannon fire), wait for them to drop or waste.
Upon casting, Earthshatter's wind-up cue (hammer raising) can alert enemies, so angle yourself where barriers won't block.
Post-Shatter Sequences
Immediately after Shatter, Reinhardt should capitalize: a common follow-up is Fire Strike into the staggered enemies, hitting as many as possible. Then use hammer swings or a quick Charge on any survivors. Aim first at dangerous targets (supports or high DPS); the 3-second stun means you have time to kill or push them off-map.
If you land an enemy pinned or stunned, it's nearly a guaranteed kill with your burst combo. Use your team's coordination – for example, Brigitte can Whip Shot a pinned foe away or Ana can Nano-Boost you for a follow-up smash. Communicate "Shatter" to allies so they can shove enemies into it (e.g. Rogue Orisa Fortify, D.Va Boost).
Animation Cues
Beware: flying enemies (Winston, Pharah) are only hit if they're within ~1.77m vertical range, so time Shatter when foes are grounded. Don't spam Earthshatter on minimal targets; it's best used when at least two enemies are in its cone. Remember that walls block Shatter – e.g. Reinhardt on Ilios Ruins Bridge can Shatter enemies on point center but not those around a corner.
Rehearse "flash shatters" by moving and Shattering as you drop shield, surprising enemies who thought they were safe. With practice, Earthshatter combos (often called "Hammer-down-wombo") can wipe teams.
8. Positioning and Space Creation
As a main tank, Reinhardt's job is to create space for his team by advancing and securing territory. Good positions include choke points and raised ground with one approach – from there your barrier blocks enemy sightlines. Always be the front-most hero on your team: literally stand in front of squishies to block threats.
When pushing on Hybrid/Escort maps, hold the point or payload with your shield first, and inch forward methodically. Move the shield forward only when safe; use corners to reset or hide the barrier if it's low. When stopping to fight, angle your barrier so it covers the widest frontal area (e.g. diagonal to a long hallway).
If enemies lack dive or poke, you can lean forward aggressively to pressure them off critical high ground (e.g. contesting the first shelf on Eichenwalde). In stalemates, a well-timed shield drop and charging around a corner can scare opponents. In general, create space by threatening to push forward: your shield acts as an anchor point.
Communicate with teammates (e.g. "Holding angle here") and advance when supports are ready. If playing with another shield (Orisa/Sigma), form a "shield wall" – align your shields to form an impenetrable barrier. Conversely, if barriers are down or at cooldown, pull back or pivot to avoid getting picked. Good Reinhardts balance aggression with caution, always aware of sightlines and cover.
9. Synergies and Team Compositions
Reinhardt thrives with supports and DPS that complement a slow frontline. Ideal supports include Lucio (boop/amp) and Ana (nano-boost on Earthshatter or Charge, sleep on flankers), as well as Mercy (damage boost or Res off critical plays). Brigitte provides extra close-range peel and an "invuln + heal" with Rally.
Zarya pairs especially well: her bubbles empower Reinhardt's all-ins and her Graviton can set up guaranteed multi-shatters. Baptiste's Immortality Field allows Reinhardt to risk shatter more aggressively. DPS heroes that work in Reinhardt comps are typically high-damage or area-denial champions – for example, Bastion or Symmetra behind your shield, Mei walls to trap foes in your Shatter, or hitscan flankers like Hanzo/Ana who protect their distance.
| Hero Type | Strong Synergies | Synergy Benefits |
|---|---|---|
| Supports | Ana, Lucio, Mercy, Brigitte | Nano boost, speed amp, damage boost, Rally protection |
| Tanks | Zarya, Orisa, Sigma | Bubble protection, double shield, crowd control |
| DPS | Bastion, Symmetra, Mei, Hanzo | Shield power, area denial, frozen targets for Shatter |
Team coordination magnifies Reinhardt's impact. Communicate Earthshatter/Charge combos (e.g. "Shatter now, dive on top of them!"). Nano-boosting Reinhardt can let him smash through defensive ultimates. Double-shield setups (with Orisa, Sigma) let Reinhardt play with a near-indestructible front line; combine Fortify and Steadfast for a near unmovable anchor.
Composition-wise, Reinhardt fits "goats"-style or poke comps – if your DPS are mid-range hitscan or multiple damage dealers, Reinhardt provides the necessary tank line. He is weaker in hyper-mobile "dive comps" unless you force the enemy to brawl by controlling the point. Adapt to the team: swap to Orisa/Sigma if needed to absorb flank damage, or pair with Zarya/Lucio dives to go for specific targets. The key is a protect-your-backline approach: as long as your supports and damage are covered by your shield, Reinhardt unlocks their damage potential.
10. Countering and Being Countered
Hard Counters
Reinhardt's large profile and immobility make him vulnerable to certain heroes. Brigitte can stun-charge combo him, and Whip Shot outplays him at close range. Pharah is a persistent threat since she hovers above your shield. Reaper excels at eating through your barrier and flankers like Genji or Tracer can exploit your slow turns.
Winston and D.Va harass your shield with projectiles and can bypass it with Jump Pack or Boosters; Sombra hacks can shut off your barrier or ult. When faced with these counters, play extra defensively: angle shields for Pharah's rockets, back up when Brig charges, and let your team handle flankers. Calling out enemy cooldowns is crucial – don't press forward if you suspect a Brig stun or Doomfist punch coming.
How to Adapt
Against these threats, consider swapping or adjusting playstyle. For example, versus a dominant Pharah, a Winston/Sigma might be better shield tanks. If Brig or flankers are overwhelming, keep your shield angled and dodge unpredictably behind cover. Use your barrier to bait enemy abilities (let Pharah waste Concussive Blast on your shield) and only counter-punch when safe. If pinned by Brig, Strafe and teleport blockers can escape.
Reinhardt counters immobile or chokepoint-reliant heroes: he punishes Widow/Ashe camps by simply closing distance with Charge and hammer. He outshines other tanks vs hard hitscans like McCree, as his shield negates their damage. In matchups, focus on high-priority targets once an opening appears (a solo Lucio or Mercy behind the line is a prime target when your shield is up).
Constantly evaluate whether you're the right main tank – if the enemy composition is overwhelmingly anti-Shield, it might be smarter to switch to Orisa/Sigma or another tank.
11. Map-Specific Guides
Reinhardt's effectiveness can vary by map type, but core principles remain: control chokepoints and high ground. On Control maps, hold central high ground (e.g. Eichenwalde well, Ilios well) so you cut off enemy sightlines. Use Earthshatter to contest mid-fights on payload maps.
For Escort/Hybrid, use shields to block tight bottlenecks. On the first choke of Numbani or Dorado, stand firmly by the point corner to deny space. After moving the cart, hug the payload or nearby high cover. On second points with wider areas (e.g. Rialto or Junkertown 2), look for single long corridors to pin or flank (like Junkertown graveyard).
Push maps (e.g. Circuit Royale) often have tight final chokepoints – use barrier to contest the objective circle and Earthshatter when multiple enemies cluster. Across all maps, learn where to Earthshatter from (high ledges often give you advantage, e.g. Ilios Ruins cliff or Horizon Lunar Basalt cliff), and avoid enemy high-ground angles.
Consult top-player VODs or community map overlays for precise "pin spots," but generally think maximize your safe forward pressure: lead every fight with barrier on the point or payload until it's breached.
12. Rank-Specific Strategies
Bronze–Platinum
At lower ranks, Reinhardt's shield is especially powerful – enemies often lack focus fire or coordinated poke, so you can carry by simply blocking and swinging. Feel free to be aggressive: charge flanking DPS and press forward onto points. Practice animation cancels (Fire Strike after swings) to eliminate targets. Your barrier will often cover misplaced shots, so use it liberally. Work on shooting Fire Strikes through shield cracks for ult charge. If you're struggling, sticking with one strong partner (like a Lucio or Mercy) and focusing on one direction helps.
Diamond–Master
Players here will punish poor barriers and wrong charges. Prioritize protecting supports and call out flanks. Learn to bait enemy cooldowns (make them use Brig stun on your shield, then charge afterwards). Work on timing Earthshatter with your team's follow-ups. Your charge attempts must be calculated – a single wrong jump can wipe. Shield management becomes critical: ration barrier HP and learn to trade (e.g. switching with Orisa between fights). Position on high ground more often, and use obstacles cleverly.
Grandmaster–Challenger
Reinhardt is niche at elite levels, so you must outplay. Expect every move to be anticipated; vary your timing. Perfect "flinch" plays: pretend to charge to bait enemy strikes. Master swipe feints and quick turn swings. Coordinate Earthshatter with precise Nano and speed boosts. Learn optimal map-specific shatter angles (for example, corner-of-wall shatters that affect only part of choke). Focus heavily on ult economy and shot-calling – your team will look to you to initiate fights and retreat correctly. At these ranks, even small mistakes (overcharging, misdropping shield) are costly, so practice in scrims or review replays to refine every rotation and cooldown usage.
13. Advanced Tech and Mechanics
Reinhardt has a few advanced tricks worth knowing. One is the fire-strike + barrier double-hit: by casting Fire Strike and then quickly toggling your barrier on/off, the projectile can hit two times for extra damage/ult. Another is charge-cancel maneuver: if your Charge is off-target (or you see a stun incoming), pressing Charge again cancels the dash and immediately allows barrier re-activation. This can trick opponents expecting you to commit.
Animation Cancels
We covered hammer→Fire Strike, but you can also chain Earthshatter into Charge. If you shatter a target near you, you can almost instantly dash to follow them to walls for extra damage. Shield Hop: Reinhardt cannot jump with shield, but you can crouch+move to "hop" corners quickly for tiny distance advantages (a very advanced movement to slightly reposition behind cover).
// Advanced Combo Sequence
Earthshatter → Fire Strike → Charge → Hammer Swing
// This sequence maximizes damage on stunned targets
"Flash Shatter"
In Stadium mode there is a Shield Slam, but in normal play a similar concept is sliding or stepping while raising Earthshatter – the ult will still activate with a wider radius than usual. Practically, practice taking slightly different angles to catch enemies you didn't expect.
Perhaps the most important tech is animation fluidity: after charging, you still have your swing and Fire Strike available (no lost abilities). Always chain your abilities smoothly: e.g. Swing → Fire Strike → Charge without waiting. This maximizes burst damage. Lastly, practice "death bounces" for charge: if you miss a pin, bounce off an angled wall to turn quickly for an instant Hammer swing on the stunned target. These microtechs require custom training or deathmatch practice to execute reliably.
14. The Psychology of Reinhardt
Playing Reinhardt is as much mental warfare as mechanical. Your shield presence alone forces enemies to make decisions – freeze them by stalling behind your barrier, then suddenly charge or hammer swing to make them panic. Use voice lines and taunts sparingly for intimidation (a well-timed "Hammer Down!" can dishearten foes). Baiting is key: project your shield one way then quickly shift to flank or drop it to feign weakness. This can lure enemies into traps (e.g., enemy Winston might jump in thinking you're idle, only to be hammered).
Show confidence by occasionally walking forwards on your own after killing someone, implying no fear. But don't get cocky – overconfidence leads to predictable mistakes. Finally, pressure builds siege – constantly threaten to push so opponents hesitate to contest. For instance, if an enemy team is hiding behind a corner, face them with shield up; even if they're invulnerable, the threat of you turning and charging can force them out of position. Engaging minds as well as bodies makes Reinhardt a psychologically dominant hero.
15. VOD Review Guidelines
Self-review is invaluable. Record your games and watch them critically: check for missed opportunities – was your Charge blocked by a pillar, did you swing too early, or did you shatter into a corner? Pay special attention to shield uptime: note how often your barrier was broken and why. After fights, ask "Did I waste cooldowns?" (e.g. charging into nothing). Look at your positioning: were you too far forward or too passive? Also review ultimate usage: did Earthshatter hit at least two targets? Coordinate with replay analysis tools to see damage numbers – this tells if your swings/Fires were effective.
When watching pro player or VOD reviews, observe their barrier angles and how they rotate it as fights move. Notice communication: top Reinhardts call their actions ("I have shatter", "hold up") to sync with team ults. Finally, after identifying mistakes (e.g. "I charged into a Brig"), plan corrections ("Hold my Charge until I see Fortify down"). Consistently iterating like this – even reviewing losses – quickly improves decision-making and mechanics.
| Focus Area | What to Review | Improvement Actions |
|---|---|---|
| Shield Management | Barrier breaks, positioning, timing | Optimize rotation, use cover better |
| Charge Decision-Making | Successful pins vs. missed charges | Identify safer charge angles, practice cancelling |
| Ultimate Usage | Effectiveness of Earthshatters | Work on timing, coordination with team |
| Positioning | Frontline exposure, space creation | Refine aggression vs. defense balance |
16. Pro Player Analysis
In professional Overwatch (OWL/Contenders) Reinhardt play emphasizes discipline and synergy. Teams like the Dallas Fuel (with hyper-aggressive tank line) or Shanghai Dragons have showcased Reinhardt plays – often in double-shield comps. For example, Mano (famous from London Spitfire) was known for patient Shield-bashing play; more recently, Korean Contenders tanks run Rein+Orisa pushes that coordinate Graviton+Shatter. Generally, pro Reinhardts use fewer flashy charges and focus on enabling damage dealers (like World Cup matches where Reinhardt kept Bastion alive behind his shield).
Comparatively, some high-level Rein players (like YnHeaL or Mooty) spotlighted creative Charge angles and quick Earthshatters to swing fights. Studying VODs of teams using GOATS-like compositions (Reinhardt, Zarya, Lucio, etc.) shows tight positioning – the tank line moves as one, often moving Reinhardt at the pace of Lucio speed boosts and halts.
Watching OWL tank mains reveals they prioritize timing (waiting for key enemy cooldowns) and ultimate economy (team-wiping shatters followed by tactical regroup). Emulate their calm decision-making and team communication. Even if strategies differ (OWL often favors Sigma/Orisa in high mobility meta), top Rein players demonstrate core habits: cover ranged angles, bait enemy ults with shield, and unleash Earthshatter at decisive moments. Their replays (many on YouTube) are great study material for advanced spacing and combo execution.
17. Advanced Earthshatter Techniques
Beyond the basics, Earthshatter has some deeper applications. For instance, "follow-up protections": after Shattering, use Fire Strike or charge smartly to protect squishies. If Reinhardt is likely to be attacked, time a swift Shatter and immediately swing to deter enemies from egging your team. You can also recover quickly after Shatter by pressing your shield and moving – some players practice "half-shield drops" to regain defense mid-combo.
Another technique is double-layered barriers: if playing Rein/Orisa, Orisa can briefly Fortify behind Reinhardt's Shatter to make that brief recovery invulnerable. Also, drop Shatter on high-density targets – if only 1 or 2 enemies appear, hold it and wait for more; the patience can pay off as splitting Shatters wastes it.
Post-Shatter, use "cooldown buying": after casting, your shield is up slower (Reinhardt is momentarily vulnerable), so step back into cover before raising it fully. Mastering these subtleties (like not cocking hammer too early) turns Earthshatter into a truly game-winning tool rather than just a panic button.
18. Practice Routines and Drills
Improve Reinhardt through targeted drills. In the training range or custom games, set bots to hog the barrier: practice time your swings by left-clicking bots' heads, and immediately use Fire Strike to animation-cancel. Do this with or without AI aiming to train muscle memory. For barrier work, set yourself to "Wait for bots", then toggle barrier on/off rapidly to practice peeking.
// Custom Game Settings for Barrier Practice
Game Mode: Skirmish
Heroes: Reinhardt Only (self), Ana (enemy bots)
Modifiers: Reduced damage, increased health
Settings: "Wait for Bots" enabled
// Practice shield toggles and barrier management against predictable opponents
Custom games with heroes like Squishy (a support bot) can help with charge combo drills: spawn a stationary Ana 5m from a wall, practice charging and pinning her into the wall repeatedly to ingrain the timing. Similarly, place mobile training bots in a queue at different distances, practice hitting them with double-swing plus Fire Strike.
Map navigation drills: load each map and sprint through potential Rein charge lines or Earthshatter vista points. For example, on "Ilios Ruins", practice jumping off the cliff then Shattering into center.
Routine: each session warm up swinging and barrier toggles for 5 minutes, then do a few deathmatch games focusing on landing Hammer hits and Fire Strikes. Watch a short video of Reinhardt VODs beforehand to prime your mind. Use a journal to note errors (like "shield bait – forgot to drop barrier") and focus next session on it. With repetitive drill (even 20 mins a day), your aim and muscle memory will sharpen.
19. Main Tank Fundamentals
As the main tank, Reinhardt has macro responsibilities beyond his kit. Always keep track of ultimate economy: your shatter is a team ultimate, so communicate its charge ("Earthshatter in 10%") and coordinate with allies' ults (e.g. follow Jinno Sleep, Zarya Grav). If your supports use major abilities (like Mercy Res or Lucio Boop), use that window to engage. Conversely, try to bait enemy ultimates behind your shield (e.g. scoot your barrier in front of a D.Va bomb or Junkrat Riptire).
On shot-calling, call plays like "I push" or "I fall back" clearly. Reinhardt often leads engagements: decide when to dive and when to hold. If your DPS are off-guard or key abilities aren't ready, hold the line under cover. If your team signals an attack, time your Charge or Shatter to initiate. Never solo-queue recklessly – tell your team when your abilities are ready and ask for peel when you're vulnerable (e.g. "Stuck on high ground, need healers behind").
If swapped to Orisa/Sigma mid-game, help transition by covering their flank. During neutral fights, keep escort objectives or point-center blocked. Watch the kill feed: if you see enemy tanks (e.g. Roadhog) dead, you may need to push or contest. In general, your ultimate shot-calling tool is your barrier – wherever it goes, your team should lean. Learning to balance aggression and protection is the essence of main-tanking.
20. FAQ and Troubleshooting
Ensure you only block significant damage. If your barrier cracks quickly, you're either taking too many hits (tell teammates to help clear fire) or overextending. Remember it has 2000 HP and regens at 160/s; don't waste it on stray bullets.
Aim at enemies' feet or torsos; Reinhardt's swings have a long vertical range (hits ~2m high). Swing at any part of enemy model for consistent damage, but if they're jumping, aim lower so the hammer meets their feet.
Coordinate with team. Commonly Graviton Surge comes first (clumping enemies), then Shatter. But if you have nano first (nano-Rein), and enemies lack barrier, an open Shatter followed by team combo can be deadly. Talk it out with Zarya.
Recent patches buffed Reinhardt's barrier (HP 1500 → 2000) and restored 30% knockback reduction. Fire Strike lost its extra charge, so be more judicious with usage. Keep abreast of balance notes – as of Season 16, there are no further nerfs. Check patch notes on Blizzard's site for the latest "Hero Updates" (any changes will be there).
If performance drops under shielding, try lowering graphic settings for effects. Toggle-based shield uses slightly less constant processing than hold-based. Ensure your HUD isn't overloaded with unnecessary elements. If lag persists, reduce Discord/overlay use.
If you prefer ultra-mobility or high-skill flanker play, tanking might feel restrictive. Reinhardt is less effective on open maps like Ramattra-centric maps where long sight lines dominate. If your team already has two shields (e.g. Orisa+Sigma), playing Sigma (or Orisa) might offer more versatility. Always be ready to swap to a secondary tank if counters become overwhelming.