
Lena Oxton, call sign "Tracer," stands as one of Overwatch's most iconic and defining heroes. As the quintessential high-mobility flanker, her role revolves around disrupting enemy backlines, securing pivotal eliminations on high-priority targets, and applying relentless pressure through superior movement, positioning, and timing. Tracer embodies the concept of a "glass cannon" – possessing immense damage potential and evasiveness, yet balanced by the lowest health pool among Damage heroes, demanding exceptional mechanical skill, game sense, and cooldown management to unlock her full potential. Mastering Tracer is a journey of precision, prediction, and calculated aggression, rewarding dedicated players with the ability to dictate the tempo of engagements and dismantle enemy strategies. This guide offers a comprehensive exploration of Tracer in Overwatch, delving into her origins, dissecting her abilities with precise data, outlining core gameplay principles, revealing advanced techniques, analyzing strategic layers like team synergies and map control, providing rank-specific advice, examining professional play, suggesting practice routines, optimizing settings, and addressing frequently asked questions for players committed to mastering this time-jumping adventurer across all competitive levels.
I. The Chronal Accelerator: Tracer's Lore and Origins
Understanding Tracer's unique mechanics and playstyle begins with her origins. Lena Oxton was a prodigious pilot in the British Royal Air Force, known for her fearless approach and innate skill, which led to her becoming the youngest person ever inducted into Overwatch's experimental flight program. She was handpicked to pilot the OWX-01 Slipstream, a prototype fighter jet capable of teleportation.
During the Slipstream's maiden flight, a catastrophic malfunction occurred with the teleportation matrix. The aircraft vanished, and Lena Oxton was presumed dead. She reappeared months later, profoundly altered. The accident had desynchronized her molecules from the normal flow of time, afflicting her with "chronal disassociation." She became intangible, a "living ghost" phasing in and out of existence for hours or days at a time, unable to maintain a stable physical form.
Overwatch's scientists were baffled until the brilliant scientist Winston took up her case. He designed the chronal accelerator, a device worn by Tracer that anchors her firmly in the present timeline. Crucially, this device not only stabilized her existence but also granted her control over her personal timeline, manifesting as her signature abilities: Blink and Recall. This origin story is not merely flavor text; the chronal accelerator is the narrative and mechanical core of her character, directly explaining the source of her unique mobility that defines her gameplay.
With her newfound abilities, Tracer (Agent ID: 3945_50) became one of Overwatch's most effective agents. Her notable missions included halting the Null Sector uprising in King's Row, assisting in the apprehension of Talon financier Maximilien in Havana, and playing a key role in the capture of Doomfist in Singapore.
Following Overwatch's disbandment under the Petras Act, Tracer found civilian life unfulfilling. She returned to London, living with her girlfriend Emily, and operated as a vigilante. An encounter with an omnic named Iggy led her to discover the harsh conditions faced by omnics in London's Underworld. She was present during the tragic assassination of the Shambali leader Tekhartha Mondatta by Widowmaker, an event that further fueled human-omnic tensions despite Tracer's attempts to intervene.
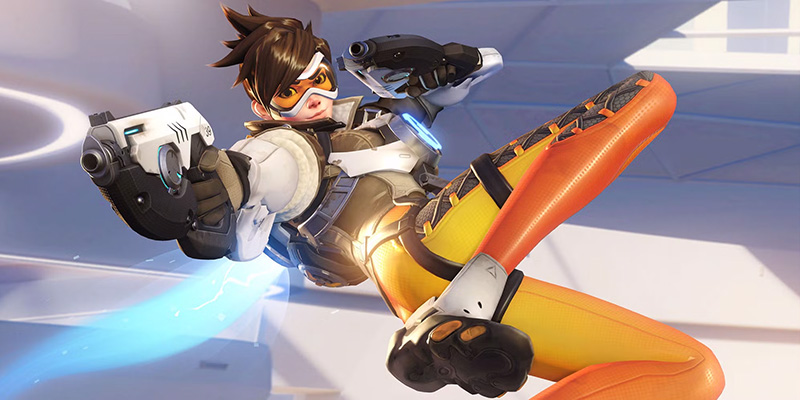
Tracer's irrepressibly optimistic and energetic personality is reflected in her fast-paced, disruptive playstyle. Her visual design, featuring the iconic bomber jacket, goggles, and leggings, evolved alongside her backstory, with the chronal accelerator always remaining a central visual element. Her Overwatch design presents a sleeker, more modern look but retains these core elements. Interestingly, Tracer was one of the first heroes developed for Overwatch, evolving from the "Jumper" class concept in Blizzard's cancelled Project Titan, which possessed similar Blink and Recall abilities. This deep integration of narrative, design, and mechanics makes understanding her lore crucial to fully grasping why she plays the way she does – a time-manipulating force for good, constantly darting through the battlefield.
II. Tracer's Toolkit: Abilities Deep Dive
Mastering Tracer requires an intimate understanding of her abilities, their precise numerical values, and how they interact.
Tracer's primary weapons are twin short-range, automatic, hitscan pistols fired simultaneously.
- Stats: Each bullet deals 5.5 damage, resulting in 11 damage per simultaneous shot pair. With an ammo capacity of 40 bullets (20 pairs) and a rapid rate of fire of 20 shots per second (0.05 seconds per shot pair), a full clip can theoretically deal 220 damage in 1 second (440 potential damage if all shots are headshots). The reload time is a swift 1.15 seconds.
- Damage Falloff: Damage begins to decrease beyond 12 meters and reaches its minimum at 20 meters. This range has seen adjustments; it was previously increased from 10m to 13m before being set to the current 12-20m range.
- Spread: The pistols have significant spread, drastically reducing accuracy and effective damage at medium to long ranges. Notably, the spread was increased by 15% in a June 2023 patch, further emphasizing her close-range specialization.
- OW2 Changes: Damage per bullet has fluctuated (initial OW2 launch saw changes, eventually settling at 5.5 after patches adjusted it from 6 to 5, then back to 6, then down to 5.5). The 15% spread increase is a major functional change from earlier OW2 states.
Blink is Tracer's defining mobility tool, allowing instantaneous horizontal teleportation in the direction she is currently moving.
- Stats: Tracer stores up to 3 Blink charges. Each charge has a 3-second cooldown. Each Blink covers a distance of 7.5 meters.
- Mechanics: While primarily horizontal, Blink can traverse small vertical ledges or obstacles if the path is partially obstructed. Player momentum is maintained through the Blink, which can slightly alter the perceived travel distance. An accuracy improvement (Patch 1.47) made the destination more likely to align with the player's crosshair.
- OW2 Changes: A subtle visual trail indicating the Blink direction was added (reportedly in a May 2023 patch), making Tracer slightly easier for enemies to track. The core cooldown and distance remain unchanged.
Recall is Tracer's signature defensive and utility ability, rewinding her state in time.
- Stats: Recall has a 12-second cooldown. It returns Tracer to her exact position, health total, and ammo count from 3 seconds prior. The Recall animation itself lasts 1.25 seconds, during which Tracer is invulnerable.
- Mechanics: Recall instantly cleanses all negative status effects, such as Ana's Biotic Grenade anti-heal or Zenyatta's Discord Orb. It also fully reloads her Pulse Pistols if they were not full 3 seconds prior. There is a brief activation animation before the rewind begins.
- OW2 Changes: The core mechanics remain unchanged in Overwatch. Its interactions with new status effects or abilities are the primary difference.
Tracer's ultimate ability is a fast-charging, high-impact sticky explosive.
- Stats: Pulse Bomb deals a maximum of 350 damage in its explosion. It also deals a minor 5 damage upon sticking directly to an enemy (this stick damage is reduced by armor), for a total potential of 355 damage to the stuck target. The explosion has a radius of 5 meters. The ability has a 1-second casting animation (lobbing the bomb), and the bomb detonates 2 seconds after being thrown. It is the fastest-charging ultimate in the game, fueled by dealing damage.
- Mechanics: The bomb adheres to the first surface or enemy it contacts. Tracer can be damaged and killed by her own Pulse Bomb explosion if within the radius.
- OW2 Changes: The damage (350) and radius (5m) remain consistent with later OW1 values. The primary change in OW2 is its interaction with globally increased hero health pools and new defensive abilities like Kiriko's Protection Suzu, which can cleanse the bomb or negate its damage.
Like all Damage heroes, Tracer benefits from a role-specific passive ability, which has changed since Overwatch's launch.
- Original Passive (OW2 Launch): Upon securing an elimination, Damage heroes gained a 25% bonus to movement speed and reload speed for 2.5 seconds. This rewarded aggressive plays and kill chains.
- Current Passive (Season 9 Onward): Dealing damage to an enemy applies a debuff that reduces healing received by 20% for 2 seconds. This effect refreshes each time the target takes damage from a Damage hero.
- Impact on Tracer: The current healing reduction passive is highly synergistic with Tracer's kit. Her rapid-fire Pulse Pistols allow her to easily apply and maintain the 20% healing reduction debuff on targets, even with chip damage from moderate range. This directly mitigates one of her historical weaknesses – struggling to confirm kills through high sustain and pocket healing. It significantly increases her pressure on enemy supports and makes her damage more impactful, even if it doesn't immediately result in a kill, aiding significantly in duels against self-sustaining heroes like Moira or Brigitte.
Tracer's health has been a defining characteristic and subject to change.
- Current Health: 175 HP. This was increased from her long-standing 150 HP during the global health adjustments in Season 9.
- Historical Significance of 150 HP: For years, Tracer's 150 HP pool made her exceptionally fragile. She was vulnerable to numerous one-shot kills (Widowmaker headshot, Hanzo headshot) and quick combos (Cassidy Flashbang + Fan the Hammer, various damage-boosted thresholds). This low health demanded near-flawless execution of her mobility and cooldowns for survival.
- Impact of 175 HP: The increase to 175 HP provides a significant boost to her survivability. It crucially pushes her beyond several important damage breakpoints, meaning attacks that previously killed her in one hit no longer do. For example, she now survives an Ashe headshot (150 damage) and a Cassidy headshot (140 damage) without damage boosts. This added resilience makes her more forgiving to play, allows for slightly riskier engagements, and reduces the frequency of instant deletion from stray damage or less-than-perfect shots. However, this increased survivability also potentially lowers her skill floor and can make her feel more oppressive to opponents, as traditional quick counters are less effective.
- Breakpoints: These are critical damage thresholds that change the number of attacks needed to secure a kill. Understanding these for both dealing and receiving damage is vital for optimizing Tracer's Time To Kill (TTK) and survival. With 5.5 damage per bullet (11 per pair) and 30 melee damage, players must calculate shots needed against various enemy HP pools (e.g., 200 HP requires approx. 19 body shots or 10 headshots). Defensively, knowing which abilities can still one-shot her (e.g., Widow headshot, Hanzo full headshot, Sojourn charged rail headshot) versus those she now survives (listed above) informs risk assessment during engagements.
| Ability | Type | Details | Cooldown (s) | Notes |
|---|---|---|---|---|
| Pulse Pistols | Primary Fire | Damage: 5.5 per bullet (11 per pair) RoF: 20 shots/sec Ammo: 40 Reload: 1.15 sec Falloff: 12m-20m Spread: Significant (Increased 15% in June 2023) |
N/A | Hitscan, high spread limits effective range. |
| Blink | Ability 1 | Charges: 3 Distance: 7.5 meters Movement: Directional, horizontal bias, maintains momentum, slight vertical capability on ledges |
3 per charge | Core mobility, resource management crucial. |
| Recall | Ability 2 | Rewind Time: 3 seconds Duration: 1.25 sec (Invulnerable) Effect: Restores position, health, ammo from 3s prior; Cleanses negative effects |
12 | Defensive reset, offensive combo potential, reload utility, predictable return point. |
| Pulse Bomb | Ultimate | Damage: 350 explosion + 5 stick (potential 355 total) Radius: 5 meters Projectile: Throwable, sticky Cast Time: 1 sec Detonation Time: 2 sec after throw Charge: Fastest in game |
N/A | High-priority pick tool, self-damage possible, low multi-kill reliability. |
| Role Passive | Damage Passive | Effect: Damaging enemies applies a 20% reduced healing received debuff for 2 seconds | N/A | Synergizes well with Tracer's high RoF, increases kill potential vs sustain. |
| Health | Stat | Total: 175 HP (Increased from 150 in Season 9) | N/A | Increased survivability, passes key damage breakpoints. |
III. Dimensional Darting: Advanced Blink Management
Blink is not merely a movement tool; it's an intricate dance of spatial awareness, resource management, and psychological manipulation. True mastery goes beyond simply moving from A to B.
Three-Dimensional Thinking
While Blinks are primarily horizontal, understanding their interaction with map geometry unlocks new possibilities.
- Horizontal: Standard use for closing distance, dodging, flanking, and repositioning on flat ground or across gaps. Use movement keys (WASD) to Blink in any horizontal direction.
- Vertical Blinks (Ledge Blinks): Blinking towards ledges slightly above or below your current elevation can allow Tracer to snap onto them. This is crucial for quickly accessing high ground or dropping silently. The key is aiming slightly above the ledge you want to reach or towards the edge you want to drop from while moving forward. Precise knowledge of map-specific ledge heights and Blink distances (7.5m) is essential.
- Diagonal Blinks: Combining forward/backward movement with strafing (e.g., W+A or S+D) before Blinking results in diagonal movement. This is vital for complex dodging patterns, rounding corners tightly, and repositioning unpredictably mid-fight.
Blink Conservation: The Art of Patience
- Never Waste Blinks: Avoid using Blinks for simple traversal when walking or using cover achieves the same result safely. Treat each Blink as a valuable resource.
- The One-Blink Rule: Aim to always keep at least one Blink charge available for emergency escapes or reacting to unexpected threats. Using all three offensively often leaves you dangerously exposed.
- Cover-to-Cover Blinking: Use Blinks to move rapidly between points of cover, minimizing exposure time during flanks or retreats. Map knowledge is key here.
- Natural Movement: Integrate walking and jumping with Blinking. Don't rely solely on Blinks; weave them into natural movement patterns to conserve charges and be less predictable.
Blink-Melee Combo
- Mechanics: Blink directly through or slightly past an enemy, immediately turn 180 degrees (or the necessary angle), and press melee (Default: V). The Blink's momentum helps close the gap instantly, and the melee provides a quick burst of 30 damage.
- Applications: Excellent for finishing off low-health targets (especially those under 30 HP), adding extra burst during a one-clip attempt, or quickly dispatching static targets like turrets or deployed Immortality Fields. It's also useful for disrupting snipers.
- Practice: Requires rapid mouse movement (or stick control) for the 180-degree turn and precise timing. Custom games against static bots are useful for drilling this muscle memory.
Blink Reload Cancel
- Mechanics: Initiate the reload animation, and then immediately use Blink. The Blink animation overrides the later part of the reload animation, but the reload still completes, effectively shortening the downtime.
- Timing: The Blink must be timed correctly during the reload animation (roughly after the pistols are discarded but before the new ones are fully drawn). Blinking too early cancels the reload entirely; blinking too late provides no time save.
- Benefit: While the time saved is marginal (fractions of a second), in high-level play, this optimization can mean the difference between securing a kill or being eliminated during reload vulnerability. It maintains pressure and movement fluidity.
Blink Baiting and Mind Games
- Feinting Engagements: Blink towards an enemy as if initiating a fight, then immediately Blink back or sideways into cover. This can bait out crucial cooldowns like Ana's Sleep Dart, Cassidy's Magnetic Grenade, or Moira's Fade.
- Directional Misdirection: Blink in one direction, then immediately Blink in another (e.g., Blink left, then instantly Blink right or back). This makes your movement highly unpredictable and harder for enemies to track, especially hitscan players.
- Using Audio Cues: Enemies hear the distinct "zip" sound of Blink. Blinking near cover without revealing yourself can create psychological pressure, forcing enemies to reposition or expend resources checking corners, even if you don't commit to a fight.
- "Ghost" Blinks: Blinking through thin walls or around corners where the enemy loses line of sight forces them to guess your new position.
Advanced Blink Tracking (Against Opponents)
- Predictive Aiming: Anticipate where an enemy Tracer (or other mobile hero like Genji) will Blink to, rather than tracking where they are. This involves understanding common Blink patterns, distances (7.5m), and map geometry.
- Audio Cue Reliance: Listen carefully for the Blink sound direction to quickly snap your aim towards the Tracer's likely reappearance point. High-quality headphones and surround sound settings are advantageous.
- Cooldown Counting: Mentally track how many Blinks an enemy Tracer has used. Knowing they are out of Blinks creates a window of vulnerability to exploit.
Directional Audio Cues During Blinks
- Self-Awareness: Pay attention to the audio cues your own Blinks create. While subtle, understanding how your movement sounds to others can help you anticipate how they might react.
- Environmental Interaction: Listen for sounds like footsteps resuming immediately after a Blink, indicating your landing spot. Different surfaces produce different footstep sounds, which astute enemies can use to pinpoint your location even without direct line of sight.
IV. Chronal Anchor: Recall Mastery
Recall is far more than a panic button; it's a strategic tool for health management, ability baiting, repositioning, and offensive plays. Understanding its nuances elevates Tracer's survivability and impact dramatically.
Predictive Recall Usage
- Anticipating Burst Damage: Don't wait until you're critically low. Recall before anticipated bursts of damage land, such as seeing a Junkrat mine thrown your way, hearing a Hanzo Storm Arrow activate nearby, or predicting a Roadhog hook. This requires game sense and awareness of enemy cooldowns and positions.
- Pre-emptive Recalling: If taking unavoidable damage (e.g., caught in Mei's Blizzard or stuck by Cassidy's Magnetic Grenade), Recall immediately to negate the effect or minimize subsequent damage, even if your health isn't critical.
Health Threshold Recall Guides
- General Rule: While situational, a common guideline is to Recall when dropping below roughly 50-70% health during an active engagement, especially if key enemy threats are present. This provides a buffer against unexpected burst damage.
- Risk Assessment: Adjust the threshold based on the situation. Against low-burst compositions or when enemies have expended key cooldowns, you can afford to play lower health thresholds before Recalling. Against high-burst threats (snipers, Echo beam, etc.), Recall much earlier, often predictively.
- Avoid Over-Recalling: Recalling at near full health wastes the cooldown. Try to gain value from the health restoration aspect.
Using Recall Offensively vs. Defensively
- Defensive (Standard): The most common use – escaping danger, restoring health after taking damage, cleansing debuffs (like Anti-Nade or Discord). Ensure your recall position (where you were 3 seconds ago) is safe.
- Offensive (Aggressive Reset): Commit deep for a pick (e.g., diving an Ana), secure the kill, and immediately Recall back to a safer position before the enemy team can collapse. This requires confidence in securing the kill quickly and knowing your Recall point is out of immediate danger.
- Blink-Stick-Recall: A classic combo. Blink close, stick Pulse Bomb, and immediately Recall. The Recall's invulnerability frames protect you from your own bomb and potential enemy retaliation, while repositioning you safely (ideally to where you were before the initial Blink).
Recall Timing to Avoid Abilities
- Dodge Ultimates: Recall can be timed to completely avoid the damage or effects of certain ultimates if activated during their impact window (e.g., D.Va Bomb explosion, Junkrat RIP-Tire explosion, Reinhardt Earthshatter if timed perfectly just before the stun connects). This requires precise timing based on audio cues and visual warnings.
- Negate Key Cooldowns: Recall instantly cleanses Ana's Biotic Grenade anti-heal and sleep dart (if hit), Zenyatta's Discord Orb, Junker Queen's Wound effects, Ashe's Dynamite burn, and Cassidy's Magnetic Grenade stick. Recalling immediately upon being affected by these abilities negates their value.
Mental Tracking of Recall Position
- Constant Awareness: Actively remember where you were roughly 3 seconds ago at all times. Was it in the open? Behind cover? Near a health pack? On high ground?
- Pathing for Recall: Intentionally move towards safer locations before you anticipate needing to Recall. If you know a fight is coming, spend a second positioning in a safe spot, engage, and then Recall back to that safety. Avoid Recalling back into the middle of the enemy team or into line of sight of snipers.
Baiting Abilities with Delayed Recall
- Drawing Out Cooldowns: Intentionally take some damage and appear vulnerable, forcing enemies to use key abilities (e.g., Sleep Dart, Hook, Suzu) trying to finish you off. Recall just before the ability hits or immediately after taking the initial damage to negate their effort and waste their cooldown.
- The "Low Health" Bait: Sometimes, staying at lower health for a fraction longer than comfortable can bait enemies into overextending or making mistakes trying to secure the kill, creating opportunities for yourself or your team upon Recalling. This is risky and requires excellent timing and awareness.
Post-Recall Repositioning Techniques
- Immediate Assessment: As soon as the Recall animation finishes, instantly assess the situation from your new (old) position. Are enemies pushing your Recall spot? Is the target you were fighting still nearby?
- Blink Out: Often, the best immediate action after Recalling is to Blink again to a different position, especially if enemies anticipated your Recall location. Don't stand still.
- Re-engage or Disengage: Based on the assessment, decide whether to re-engage the fight (perhaps from a new angle) or fully disengage to wait for cooldowns or regroup with your team.
V. Pulse Bomb Precision: Techniques and Targets
Pulse Bomb is Tracer's signature ultimate, capable of instantly deleting key targets but demanding precision and smart target selection due to its small radius and counterplay potential.
Target Priority for Pulse Bombs
- High Priority: Supports (especially Ana, Zenyatta, Mercy, Kiriko) are often the prime targets, as eliminating them cripples the enemy team's sustain. Ana is particularly valuable due to Biotic Grenade and Nano Boost. Zenyatta is vulnerable and his loss removes Discord Orb pressure.
- Secondary Priority: Key DPS threats (e.g., Cassidy, Ashe, Sojourn, Widowmaker) who pose a significant danger or carry potential. Bastion in Assault Form is a high-value static target.
- Tank Targets (Situational): Generally less ideal due to high health pools and defensive abilities, but sometimes necessary. Sticking a Tank can force out major cooldowns (e.g., Zarya bubbles, Orisa Fortify/Javelin Spin), create space, or finish off a low-health Tank. Sticking a D.Va before she uses Defense Matrix or a Reinhardt before he raises his shield can be effective. Zarya is a decent target if her bubbles are down, as the 350 damage significantly pressures her. Avoid bombing Tanks with readily available mitigation (Orisa, Sigma, D.Va with Matrix up).
- Low Priority: Highly mobile targets (Genji, enemy Tracer, Lucio) are difficult to stick reliably and often have escapes. Targets with instant immortality/stasis (Reaper Wraith, Mei Ice Block, Kiriko Suzu) can negate the bomb entirely if timed correctly.
Stick Techniques on Different Hitboxes
- Large Hitboxes (Tanks, Bastion): Relatively easy to stick. Aim for center mass. Blink in close for a near-guaranteed stick.
- Medium Hitboxes (Most DPS/Supports): Requires more precision. Aiming slightly ahead of their movement direction can help compensate for travel time/latency. Blinking close reduces the chance of missing.
- Small/Thin Hitboxes (Kiriko, Widowmaker, Ana): Most difficult. Requires excellent aim and often prediction. Aiming for the upper torso/chest area generally provides the largest target area. Getting extremely close increases stick consistency.
- Verticality: Remember the bomb has a slight arc. Aim slightly above the target if they are at the edge of your throwing range. For targets below you, the arc is less pronounced.
- Practice: Use workshop codes specifically designed for Pulse Bomb sticking practice (e.g., Aim Arena modes, specific Pulse Bomb trainers) to hone aim against various hero models and movement patterns.
Blink-Stick-Recall Combo
- Execution: Identify target -> Blink towards/slightly past target -> Instantly flick aim onto target and throw Pulse Bomb (Q) -> Immediately press Recall (E).
- Purpose: Maximizes stick probability by closing distance, ensures survival by using Recall's invulnerability to escape the bomb's blast and enemy focus, and repositions you safely.
- Variations: Can involve one or two Blinks to close the distance before the stick. Sometimes, only Blinking out after the stick (without Recall) is viable if the situation is safe.
Tank-Focused Bomb Usage
- Pressure and Cooldown Force: Even if it doesn't kill, sticking a Tank can force vital defensive abilities (Bubbles, Fortify, Matrix, Kinetic Grasp), creating an opening for your team.
- Finishing Blow: Use Pulse Bomb to confirm a kill on a low-health Tank that might otherwise escape or be healed.
- Against Aggressive Tanks: Sticking a diving Winston or D.Va can punish their aggression and potentially kill them or force an immediate disengage.
Support-Focused Bomb Usage
- Opening Pick: The most common and often highest-impact use. Eliminating a main support early in a fight dramatically swings the advantage.
- Interrupting Key Abilities: While difficult, a well-timed bomb can potentially interrupt channeled support abilities (though usually Recall/Blink escape is faster). More reliably, it forces them to use escape/survival cooldowns.
- Targeting Pocketed Heroes: If a DPS is being heavily pocketed by Mercy, sticking the Mercy is often more valuable than sticking the pocket target.
Pulse Bomb Against Ultimates
- Countering Channeled Ultimates: Sticking a Pharah during Barrage, a Cassidy during Deadeye, or a Moira during Coalescence can instantly shut down their ultimate (if they don't have an escape like Fade).
- Punishing Static Ultimates: Bastion in Configuration: Artillery is a prime, stationary target.
- Area Denial: Throwing a bomb near an enemy using a defensive ultimate like Zenyatta's Transcendence can force enemies out of the healing aura or kill those who remain too close after it ends.
- Trading Ultimates: Using Pulse Bomb to eliminate a target about to use a high-impact ultimate (e.g., Genji with Dragonblade, Soldier with Tactical Visor) can be a valuable trade.
Team Fight Initiation with Pulse Bomb
- Creating an Opening: Secure an early pick on a support or key DPS with the bomb to initiate a team fight with a numbers advantage (5v4). Communicate the stick/kill to your team so they can push aggressively.
- Forcing Enemy Positioning: Throwing a bomb into a chokepoint or onto a contested objective can force enemies to scatter, breaking their formation and creating openings for your team to engage.
- Follow-up Potential: Coordinate with teammates. A Pulse Bomb stick can be followed up by abilities like Reinhardt's Charge, Winston's jump pack damage, or focused fire to guarantee kills even on targets who might survive the bomb alone (e.g., pocketed targets, Bastion).
VI. One-Clip Wonders: Aim Optimization & Execution
Tracer's potential hinges on her ability to secure rapid eliminations, often within a single clip of her Pulse Pistols – the coveted "one-clip." This requires optimized aim settings, precise crosshair placement, effective range management, and smart target prioritization.
Crosshair Placement Fundamentals
- Head Level Aiming: Always strive to keep your crosshair at head level, anticipating where enemy heads will appear around corners or at typical standing heights. This maximizes the chance of landing critical hits (headshots deal double damage), significantly reducing Time-To-Kill (TTK).
- Predictive Placement: Don't just react; anticipate enemy movement. Place your crosshair where you expect an enemy to peek or move into, rather than directly on their current position, especially during flanks.
- Minimize Adjustments: Proper crosshair placement reduces the amount of mouse movement needed when a target appears, leading to faster and more accurate target acquisition.
Spread Management Techniques
- Optimal Range: Tracer's significant bullet spread means damage drops off sharply beyond close range. The ideal engagement distance for maximizing damage and achieving one-clips is typically within 10 meters, often closer (5-8 meters), especially after the spread increase.
- Burst Firing (Situational): While generally less effective due to Tracer's rapid fire rate and need for burst damage, brief pauses in firing (micro-bursts) can slightly reset spread bloom at longer ranges (beyond 15m), but this drastically reduces DPS and is usually not recommended for primary engagements. Continuous fire at optimal range is preferred.
- Focus on Center Mass (If Headshots Difficult): While headshots are ideal, the spread means many bullets will hit the body anyway. Against highly mobile or small targets where consistent headshots are difficult, focusing fire on the upper chest/center mass ensures more bullets connect, albeit for less damage per shot.
Optimal Engagement Distance
- < 10 Meters: Sweet spot for one-clip potential, especially against 200-250 HP heroes. Within this range, spread is manageable enough that a significant portion of shots (especially headshots) can land.
- 10-15 Meters: Damage falloff begins (after 12m) and spread becomes more significant. One-clips are less likely unless the target is stationary or predictable. Primarily for applying pressure, finishing low targets, or farming Pulse Bomb charge.
- > 15 Meters: Significant damage falloff and wide spread make Pulse Pistols ineffective for securing kills. Use this range only for opportunistic chip damage, applying the Damage passive debuff, or harassing snipers to force repositioning, not for committed fights.
Target Priority for Different Health Pools
- < 200 HP Targets (Supports like Zen, Mercy, Lucio; DPS like Tracer, Widow): Prime one-clip candidates. A well-aimed clip, especially with headshots, can delete these targets rapidly.
- 200-250 HP Targets (Most DPS like Soldier, Cassidy, Ashe; Supports like Ana, Kiriko, Bap): One-clippable, but requires excellent tracking and a higher percentage of headshots or a finishing melee. The Damage passive helps secure kills through potential healing.
- Higher HP Targets (Tanks, Bastion, Mei, Reaper): Not realistic one-clip targets. Focus on sustained damage, forcing cooldowns, applying the Damage passive, and potentially finishing with Pulse Bomb or coordinating with teammates. Harassing tanks from angles they can't easily contest is valuable even without securing the kill.
Tracking vs. Flicking
- Tracking: Smoothly following the target's movement with your crosshair. This is Tracer's primary aiming style due to her continuous fire weapons and need to stay on target during high-speed movement (both hers and the enemy's). Essential for maximizing bullets landed during a clip dump.
- Flicking: Rapidly snapping the crosshair to a target. Useful for initial target acquisition, quick target switches, or hitting fast-moving, unpredictable targets (like a Genji double jump or enemy Tracer Blink). Tracer uses a blend, but relies more heavily on tracking for sustained damage.
- Micro-Adjustments: Constant small adjustments to keep the crosshair on target, especially crucial for headshots while both you and the target are moving.
Aim Settings Optimization
// Recommended Tracer Aim Settings for Mouse & Keyboard

- Sensitivity: 400-1600 DPI with in-game sens for 25-50 cm/360
- Crosshair: Small static (dot or cross)
- Crosshair Color: Bright green, cyan, or magenta
- Thickness: 1
- Crosshair Length: 7-12
- Center Gap: 5-8
- Opacity: 100%
- Outline Opacity: 50-100%
- Dot Size: 2-4
- Show Accuracy: Off

// Controller Settings
- Response Curve: Dual Zone or Linear Ramp
- Aim Assist Strength: 70-100
- Aim Assist Window Size: 50-70
- Aim Smoothing: 70-90 (lower = more responsive)Controller vs. Mouse Specific Guidance
- Mouse & Keyboard (MnK): Offers higher precision ceiling for tracking and flicking, enabling easier headshots and faster 180-degree turns required for Blink-Melee or reacting to flanks. Preferred for maximizing Tracer's mechanical potential.
- Controller: Relies more heavily on aim assist to compensate for lower precision. Movement (especially Blinking directionally) can be fluid. Achieving consistent one-clips, especially headshot-reliant ones, is generally more challenging than on MnK. Requires careful tuning of sensitivity, aim assist settings (Aim Assist Strength, Aim Assist Window Size, Aim Assist Ease In), and aim technique curves. Focus on optimal range and consistent body shots combined with melee finishers.
VII. Elusive Presence: Movement and Positioning Fundamentals
Tracer's survivability and effectiveness are intrinsically linked to her movement and positioning. Being in the right place at the right time, and knowing when not to be seen, is as crucial as mechanical skill.
Engagement Distances Against Different Roles
- vs. Tanks: Generally engage from slightly further out (10-15m) to harass and farm ultimate charge safely, applying the Damage passive. Only commit to close range (<10m) if they are isolated, low health, or key defensive cooldowns are down. Respect their high damage potential and crowd control (CC) abilities (e.g., Orisa Javelin, Roadhog Hook, Sigma Rock).
- vs. DPS: Matchup dependent. Against hitscan (Cassidy, Ashe, Soldier), use cover and unpredictable Blinks to close the distance (<10m) quickly, minimizing time in their optimal range. Against projectiles (Pharah, Junkrat, Hanzo), use erratic movement and Blinks to dodge, engaging when they reload or miss key shots. Against flankers (Genji, Sombra, Reaper), duels often happen at close range; focus on tracking, Blink dodging, and cooldown management.
- vs. Supports: Ideal engagement is close range (<10m) to maximize damage and secure one-clips before they can react or use defensive cooldowns. Be wary of their CC (Ana Sleep, Brig Whip Shot/Bash) and self-defense (Moira Orb/Fade, Kiriko Suzu/Swift Step, Baptiste Immortality/Regen Burst).
Using Vertical Space Effectively
- High Ground Advantage: Use Blinks (including ledge Blinks) to access high ground. This provides better sightlines for scouting, identifying targets, and engaging with less risk. Dropping from high ground onto unsuspecting targets is a powerful initiation tactic.
- Unpredictable Angles: Attacking from high ground forces enemies to look up, splitting their attention and making them easier targets for your team on the ground.
- Escape Routes: High ground often provides safer escape routes or access to different flanking paths.
Timing Engagements with Team Pressure
- Pincer Attacks: Engage the enemy backline simultaneously as your tanks and frontline push forward. This splits the enemy's attention, making it harder for them to deal with both threats effectively. Attacking too early isolates you; attacking too late misses the opportunity created by your team's pressure.
- Capitalizing on Cooldowns: Track key enemy cooldowns (e.g., Ana Nade/Sleep, Kiriko Suzu, Bap Lamp). Engage when these crucial defensive abilities are unavailable. Listen to team comms for callouts on used abilities.
- Distraction Plays: Sometimes, simply appearing on a flank, even without fully committing, can draw enemy attention and resources away from the main fight, creating space for your team.
Flanking Routes for All Maps
- Map Knowledge is Crucial: Knowing multiple flanking routes for every section of every map is non-negotiable. This includes obvious paths, less common routes using Blinks over gaps or onto ledges, and routes that minimize noise and detection time.
- Dynamic Route Selection: Don't always use the same flank. Adapt based on enemy positioning, hero composition (e.g., avoiding paths watched by Torb turrets or Junkrat traps), and the current state of the fight.
- Visual Guides: Studying map overhead views or watching VODs specifically highlighting flank routes is highly recommended. Example: On King's Row Point A attack, common flanks include going through the hotel on the left, using the statue path on the right, or blinking across the gap towards the high ground near the point. Less common routes might involve blinking onto small ledges or through upper windows.
Disengagement Techniques and Triggers
- Know When to Leave: Don't overstay your welcome. Key triggers for disengagement include:
- Using Recall.
- Dropping to critical health with no Recall available.
- Target escaping or receiving significant peel/healing.
- Multiple enemies turning to focus you.
- Your team losing the frontline engagement.
- Key enemy cooldowns coming back online (e.g., knowing Sleep Dart is off cooldown).
- Efficient Retreat: Use Blinks to break line of sight quickly and move towards cover, health packs, or your team's backline. Don't just Blink backward in a straight line; use diagonal Blinks and corner turns.
- Recall as a Reset: Recalling often signifies the end of an engagement attempt. Use the post-Recall moment to assess and decide whether to re-engage from a different angle or fully retreat.
Health Pack Locations and Timing
- Memorize Locations: Know the location of every mega (250 HP) and mini (75 HP) health pack on all maps, especially those near common flanking routes and engagement areas.
- Health Pack Routes: Plan your flanks and engagements around access to health packs. Knowing you can Blink to a nearby health pack after taking damage increases your survivability and uptime.
- Timing Pack Usage: Grab packs proactively before re-engaging if you're low after using Recall. Be aware of respawn timers (Minis: 10 seconds, Megas: 15 seconds) and deny them to enemies when possible. Hack health packs if you have a Sombra, or communicate their status to your team.
VIII. Map Mastery: Environment as a Weapon
Tracer's effectiveness varies significantly based on the map and her ability to exploit its unique layout, health pack locations, flanking routes, and verticality. Understanding map-specific nuances is crucial for consistent performance.
General Principles by Map Type
Control (Ilios, Lijiang Tower, Oasis, Nepal, Antarctic Peninsula)
- Strengths: Often feature multiple flanking routes, close-quarters combat around the point, and accessible high ground, all favoring Tracer's kit. Good for rapid repositioning and contesting the point.
- Strategies: Prioritize controlling key high ground overlooking the point. Utilize symmetrical layouts for varied flank approaches. Contest the point aggressively during retakes or to stall. Know health pack locations near the objective for sustain. Pulse Bomb targets often congregate on the point.
- Example (Lijiang Tower - Garden): Use the side bridges and window routes to access the backline. Blink across gaps near the point. Utilize the mini health packs under the bridge or the mega indoors. High ground near spawn offers scouting.
Escort (Circuit Royal, Dorado, Havana, Junkertown, Rialto, Route 66, Shambali Monastery, Watchpoint: Gibraltar)
- Strengths: Long sightlines can be challenging, but numerous side passages, buildings, and payload cover offer flanking opportunities. Tracer excels at harassing the payload pushers or defenders from off-angles.
- Strategies: Focus on attacking the supports positioned behind the payload or defending tanks. Use payload as moving cover. Exploit verticality offered by buildings (Dorado, Rialto) or cliffs (Gibraltar, Route 66). Learn health pack routes along the payload path. Pulse Bomb can halt payload pushes by eliminating key defenders.
- Example (Watchpoint: Gibraltar - First Point Attack): Flank through the right-side tunnel or use Blinks to traverse the high ground platforms on the left. Drop onto defenders holding the checkpoint from above. Utilize the mega health pack under the first bridge.
Hybrid (Blizzard World, Eichenwalde, Hollywood, King's Row, Midtown, Numbani, Paraíso)
- Strengths: Combine elements of Assault (initial point capture) and Escort. Often feature tight chokepoints initially, opening up later. Tracer can struggle with initial chokes but excels once the map opens up.
- Strategies: On Point A, focus on breaking static defenses via flanks or quick picks. Patience is key; wait for opportunities. On payload phases, revert to Escort strategies – harass from off-angles, use payload cover, target backlines. Utilize verticality where available (Eichenwalde castle, Numbani high ground).
- Example (King's Row - Point A Attack): Flank through the hotel (left) or the statue alley (right) to bypass the main choke. Use upper windows for sightlines. Pulse Bomb the defenders clustered on the point. On payload phase, use side streets and high ground to harass.
Push (Colosseo, Esperança, New Queen Street)
- Strengths: Symmetrical maps with numerous flanking routes and close-quarters engagements around the robot. Tracer's mobility is excellent for quickly rotating between lanes and pressuring the robot or enemy spawns.
- Strategies: Fight for control of forward positions and flanking routes. Harass the enemy team pushing the robot. Use Blinks to quickly contest the robot or retreat. Target supports enabling the push. Use map symmetry to predict enemy movements and set up ambushes. Learn the health pack locations in flanking lanes.
- Example (New Queen Street): Utilize the many side buildings and alleys for flanks. Control the high ground areas overlooking the central lane. Blink across streets to quickly switch pressure points.
Individual Map Analysis Highlights (Examples)
King's Row
- Flanks: Hotel, Statue Alley (Point A); Side streets, Upper walkways (Payload).
- Health Packs: Mega in back corner Point A, Minis in side rooms/payload path.
- Pulse Bomb: Point A cluster, Payload defenders, Snipers in windows.
- Blink Techs: Blinking onto Point A statue base, across gaps in payload phase streets.
Watchpoint: Gibraltar
- Flanks: Server room tunnel, Left-side high ground catwalks (Point A); Under-bridge paths, High ground drops (Points B/C).
- Health Packs: Mega under first bridge, Mini on high ground Point B, Mega in final attacker spawn area.
- Pulse Bomb: Snipers on high ground, Supports behind payload.
- Blink Techs: Blinking across large gaps between high ground platforms (requires precise angles/jumps).
Ilios (Well)
- Flanks: Side buildings, paths leading behind the point.
- Health Packs: Minis in side rooms flanking the point.
- Pulse Bomb: Targets near the central well (potential environmental kills if they dodge badly), supports in back.
- Blink Techs: Blinking across the gap near the cliff edge, onto rooftops for scouting.
Numbani
- Flanks: Left-side stairs/building, Right-side path (Point A); Upper walkways, Side rooms (Payload).
- Health Packs: Mega behind Point A, Mini on high ground near choke, Megas along payload route.
- Pulse Bomb: Defenders on high ground Point A, Payload escort targets.
- Blink Techs: Ledge-blinking onto high ground platforms on Point A from various angles.
Pulse Bomb Environmental Opportunities
While Pulse Bomb itself doesn't knock back, sticking a target near an edge (e.g., Ilios Well/Lighthouse, Rialto canals, Lijiang Garden bridge) can sometimes cause panicked enemies to accidentally fall off while trying to evade the explosion or the follow-up pressure. This is opportunistic rather than a primary strategy.
Map-Specific Blink Distances and Techs
Mastering specific Blink jumps (often requiring diagonal Blinks, jumps, or interaction with map props) allows access to unconventional positions or faster routes. Examples:
- Blinking over the train tracks gap on Midtown.
- Blinking from low ground to specific high-ground ledges on Eichenwalde Point A defense.
- Complex Blinks across rooftops on Dorado or Paraíso.
IX. Strength in Numbers: Synergies and Team Compositions
Tracer thrives in coordinated environments where her disruption and pick potential can be enabled and followed up by her team. Understanding optimal pairings and composition types is key to maximizing her impact.
Best Tank Pairings
The quintessential Dive partner. Winston dives the backline, drawing attention and creating chaos, while Tracer follows up to secure kills on distracted supports or DPS. Their mobility allows for coordinated target isolation. Primal Rage can disrupt enemies trying to peel for Tracer.
Another strong Dive partner. Defense Matrix can protect Tracer during aggressive flanks or Pulse Bomb attempts. D.Va's mobility allows her to peel for Tracer or dive alongside her. Micro Missiles add burst damage to secure kills Tracer initiates.
High-mobility disruption. Ball slams and rolls through, creating space and chaos for Tracer to exploit. Both can engage from multiple angles simultaneously, overwhelming defenses. Requires good coordination on timing engages.
Can initiate dives with Seismic Slam/Power Block engage, drawing focus for Tracer. Meteor Strike can combo with Pulse Bomb or displace enemies for Tracer to pick off. Both excel at punishing positional errors.
Optimal Support Heroes to Pair With
Excellent synergy. Swift Step allows Kiriko to quickly reach Tracer if she gets into trouble or needs healing on a flank. Protection Suzu can save Tracer from death, cleanse debuffs (like Anti-Nade), and even negate Pulse Bomb counter-abilities like Sleep Dart. Kitsune Rush significantly boosts Tracer's damage output and cooldown speed.
Discord Orb drastically reduces the number of shots Tracer needs to secure a kill, making one-clips much more consistent. Harmony Orb provides passive healing during flanks (though line of sight is required). Transcendence offers strong defensive counterplay to enemy ultimates during team fights Tracer participates in. However, Zen himself is vulnerable and needs protection.
Repair Packs provide burst healing from range and can pre-heal Tracer before an engagement. Inspire provides passive AOE healing if Tracer plays closer to the team or Brigitte positions forward. Whip Shot can peel flankers off Tracer. Rally provides speed and overhealth for aggressive pushes.
Speed Boost enables faster rotations, engagements, and disengagements for the entire team, complementing Tracer's mobility. Sound Barrier provides a powerful defensive ultimate for team fights. Healing is lower but consistent AOE.
Damage Boost significantly increases Tracer's kill potential, making one-clips easier and Pulse Bomb deadlier. Guardian Angel allows Mercy to follow Tracer (risky for Mercy) or provide healing from safer distances. Resurrection can negate a pick on Tracer, but requires Tracer to die in a safe spot. Pocketing Tracer can be effective but leaves the rest of the team vulnerable.
Full Composition Recommendations
| Composition | Tank | DPS | Supports | Playstyle |
|---|---|---|---|---|
| Classic Dive | Winston/D.Va | Tracer + Genji/Sombra/Echo | Kiriko/Zenyatta/Lucio/Brigitte | Coordinated dives onto isolated targets |
| Ball Dive | Wrecking Ball | Tracer + Sombra/Echo | Kiriko/Zenyatta/Brigitte | Ball's disruption with Tracer/Sombra follow-up |
| Rush (with Tracer Flank) | Reinhardt/Ramattra | Tracer + Mei/Cassidy/Sojourn | Lucio + Baptiste/Moira/Kiriko | Tracer plays as off-angle threat while core pushes |
| Double Flanker | Winston/Ball | Tracer + Genji/Sombra | Kiriko + Lucio/Zen | Very aggressive, overwhelming backlines |
Ability Combinations with Other Heroes
- Discord Orb (Zen) + Pulse Pistols: Melts targets.
- Damage Boost (Mercy) + Pulse Pistols/Pulse Bomb: Increases kill thresholds.
- Nano Boost (Ana) + Pulse Pistols/Pulse Bomb: Massive damage increase, survivability boost.
- Kitsune Rush (Kiriko) + Tracer: Faster firing, faster Blinks/Recall, devastating damage.
- EMP (Sombra) + Pulse Bomb: Guarantees kills on hacked targets unable to use escape abilities.
- Graviton Surge (Zarya) + Pulse Bomb: Classic combo for multi-kills (requires careful placement).
- Earthshatter (Rein) + Pulse Bomb/Pistols: Easy cleanup on stunned targets.
- Dive Coordination (Winston/D.Va Jump + Tracer Engage): Simultaneous pressure on the same target.
Communication and Callout Guide for Coordinated Play
- Target Calling: Clearly communicate primary targets before engaging ("Diving Ana," "Focusing Zen"). Call out low-health targets ("Ana one," "Mercy half").
- Cooldown Tracking: Announce key enemy cooldowns used ("Ana no nade," "Kiriko no Suzu," "Recall used").
- Engagement Timing: Signal intentions ("Diving in 3... 2... 1... Dive!"). Announce Pulse Bomb usage ("Bombing Zen," "Stuck Rein").
- Positioning: Call out enemy flankers or sniper locations ("Widow top right," "Reaper flanking behind").
- Resource Needs: Request healing or peels when necessary ("Need heals," "Genji on me").
- Ultimate Status: Report Pulse Bomb charge percentage and intentions ("Bomb in 1 fight," "Have bomb for next push").
Playing Tracer in Dive vs. Other Compositions
- In Dive: Your role is coordinated aggression. Follow the dive tank's initiation, focus the called target, use mobility to confirm kills and escape. Communication is paramount.
- Against Poke (e.g., Sigma, Ashe, Hanzo, Zen, Bap): Avoid long sightlines. Use flanks and cover extensively. Your goal is to bypass the frontline spam and pressure their backline or snipers, forcing them to reposition or diverting resources (healing/attention) away from the poke battle. Patience is key; wait for cooldowns or distractions.
- Against Brawl/Rush (e.g., Rein, Ramattra, Mei, Reaper, Lucio, Moira): Avoid direct confrontation with the core group. Play on off-angles, harass their supports from behind or the side, draw attention away from your frontline. Look for isolated targets pushed too far forward or lagging behind. Use mobility to stay out of brawl range (especially Reaper/Mei/Rein).
"The world could always use more heroes!"
Tracer's effectiveness is amplified exponentially by teamwork. Understanding synergies, fitting into appropriate compositions, and communicating clearly allows her to translate individual mechanical skill into consistent team fight wins.
FAQ and Troubleshooting: Common Tracer Queries
This section addresses frequently asked questions and common issues players encounter when learning and playing Tracer.
Common Questions from the Community:
Yes, Tracer remains a strong and viable hero, particularly in coordinated play. The increase to 175 HP (Season 9) significantly boosted her survivability against certain burst damage, making her slightly more forgiving. The Damage Role Passive (healing reduction) also synergizes well with her high rate of fire, helping secure kills through sustain. However, the increased spread on her Pulse Pistols (June 2023) necessitates closer engagement ranges. Her effectiveness always depends on player skill, team composition, and the current meta.
Turrets are major obstacles. Avoid direct line of sight. Use off-angles to quickly burst them down from outside their effective range if possible. Often, it's better to ask teammates with longer range (hitscan DPS, tanks) or splash damage to destroy them first. Don't waste Blinks or Recall trying to duel a well-placed turret alone unless absolutely necessary. Focus on other targets if the turret denies your preferred flank.
Practice consistently using custom game drills (stationary and moving bots) and workshop codes specifically designed for Pulse Bomb training. Focus on the Blink-Stick combo to get closer before throwing. Understand the slight arc. Aim for center mass on most heroes. Don't hold it forever; using it more often (even if some miss) provides more practice opportunities.
Consider swapping if you're being consistently hard-countered and shut down with little impact (e.g., enemy team has Torb, Sym, Mei, and a vigilant Cassidy/Brigitte peeling effectively). If your team composition doesn't enable your playstyle (e.g., no dive tanks and you can't find openings). If the map heavily favors long sightlines and poke compositions where you struggle to find flanking opportunities. If another DPS hero would simply provide more value against the enemy composition.
Focus on self-sufficiency. Pay close attention to visual cues: watch your tanks' movements to time engages, observe enemy cooldown usage yourself, track kill feed information. Play slightly safer, rely more on health packs. Focus on opportunistic picks rather than complex coordinated dives. Use pings effectively to communicate targets or threats.
Solving Common Gameplay Issues:
Below are some of the most common problems faced by Tracer players and practical solutions to overcome them.
| Issue | Troubleshooting |
|---|---|
| "I keep dying instantly." | Review VODs focusing on deaths. Are you Recalling too late? Blinking predictably? Engaging alone into multiple enemies? Not respecting enemy cooldowns (Hook, Sleep, Magnetic Grenade)? Improve awareness, cooldown management, and positioning. |
| "I can't seem to confirm kills." | Check engagement range (are you too far away for effective damage?). Practice tracking and headshots. Utilize melee finishers (Shoot-Melee combo). Ensure you're applying the Damage passive. Focus isolated targets or coordinate with teammates. Bait healing/defensive cooldowns before committing fully. |
| "I always run out of Blinks." | Practice Blink conservation. Use natural cover and walking for repositioning when safe. Avoid using all three Blinks offensively unless securing a vital kill and Recall is available. Aim to always keep one Blink for escape. |
| "My Recall always puts me back in danger." | Improve mental tracking of your position 3 seconds prior. Actively path towards safer locations before needing Recall. If recalling defensively, immediately Blink away from the Recall spot to avoid being predicted. |
Adjustments to Recent Patches:
- Monitor Patch Notes: Always read official Overwatch patch notes. Changes to Tracer's damage, spread, health, cooldowns, or the Damage passive directly impact her play. Adjustments to other heroes (especially counters or key targets like supports) also change matchups and target priority.
- Adapt Playstyle: For example, the 175 HP change allows slightly riskier plays against certain heroes, while the spread increase demands closer engagements. The healing reduction passive encourages more consistent pressure.
Hardware Optimization for Tracer:
// Recommended Hardware Setup for Optimal Tracer Play
- Mouse: Lightweight mouse with a reliable sensor preferred for fast movements and tracking.
- Mousepad: Large mousepad allows for lower sensitivity aiming without running out of space.
- Monitor: High refresh rate (144Hz+) monitor provides smoother visuals, making tracking fast targets easier.
- Headset: Quality stereo headset with good positional audio is crucial for hearing footsteps and ability cues.
- Performance: Aim for high and stable FPS (Frames Per Second). Lower graphical settings if necessary to achieve consistent performance above your monitor's refresh rate. Ensure low input lag.
Performance Improvement Tips:
- Warm-up Routine: Use aim trainers or custom games for 10-15 minutes before competitive play.
- VOD Review: Regularly analyze your gameplay to identify mistakes.
- Targeted Practice: Focus practice sessions on specific weaknesses (e.g., Pulse Bomb sticks, specific matchup duels).
- Stay Healthy: Breaks, hydration, sleep, and managing tilt are crucial for consistent performance.
- Learn from Others: Watch high-level Tracer players and analyze their decisions.
Troubleshooting Specific Matchup Difficulties:
When facing these challenging heroes, adjust your approach to maximize your chances of success:
- vs. Cassidy (Magnetic Grenade): Bait the grenade before committing. Play slightly outside its effective range initially. Recall immediately if stuck.
- vs. Mei: Avoid close range. Poke from distance. Bait Cryo-Freeze. Recall immediately if caught in Blizzard or slowed significantly.
- vs. Pharah/Echo: Requires strong vertical tracking. Engage when they are low fuel or closer to ground. Use high ground yourself. Focus Mercy pocket first if applicable.
- vs. Brigitte: Keep distance to avoid Shield Bash/Whip Shot. Poke her shield/health down. Bait Repair Packs/Shield Bash before engaging fully. Recall Whip Shot/Bash impact.
"The world could always use more heroes."
By addressing these common points of confusion and actively troubleshooting gameplay issues, players can overcome hurdles and continue their progress towards mastering Tracer.